Hey everyone! Ever feel that creative itch, that desire to make something beautiful and meaningful with your own two hands? Well, get ready to scratch that itch because we’re diving into the wonderful world of DIY mosaic art, specifically Christian mosaic art!
Mosaics – they’re not just for ancient ruins and fancy churches anymore. You can create your own stunning pieces of art, right in your own home. And the best part? It’s totally achievable for beginners!
Why Mosaics? A Touch of History, a Splash of Light
Think about those incredible mosaics from early Christian times. They weren’t just pretty pictures; they were powerful expressions of faith and artistry. They used materials like smalti, a hand-cut, opaque glass filled with metal oxides, which gives a beautiful, rich color, unlike stone. Smalti’s surface has a rippled texture that spreads the light. They even used gold tesserae, made by sandwiching gold leaf between layers of glass, for a warm glow.
 The peacock was often used by early Christians as a symbol of resurrection and immortality
So, what does this mean for your project? It means you can create pieces that truly capture the light and tell a story. And with modern materials and techniques, it’s easier than ever. Modern materials like vitreous tiles make colors brighter in low light, and with the right clear adhesives and white thinset you can give translucent glass the best backdrop.
Gathering Your Supplies: Building Your DIY Mosaic Toolkit
Let’s get down to brass tacks. What do you need to get started with your DIY mosaic art adventure? The key is to start simple and build a kit that sets you up for success. Remember, early Christian mosaics favored light and geometry, so choose materials that honor that aesthetic.
Here’s a checklist to keep costs low while ensuring you have everything you need:
* Glass Tiles: Vitreous or recycled glass tiles are great for starting. Look for tiles that are ¾ inch to 1 inch and have flat backs for easy adhesion.
* Adhesive: White thinset for wet areas, clear-drying mosaic glue for trays, frames, and mirrors.
* Grout: Sanded grout for wider joints, unsanded for delicate or glossy glass. A light color will enhance the glow.
* Nippers: Wheel or compound nippers for curved cuts, straight nippers for simple trims.
* Safety Gear: Eye protection (goggles are a must!), cut-resistant gloves, and a dust mask for mixing grout. Safety first!
* Surface Prep Tools: 80 to 120 grit sandpaper, isopropyl alcohol for cleaning, and painter’s tape.
* Layout Aids: Graph paper, a wax pencil, and a simple ruler. A printed template can be helpful for symbols and borders.
* Spacers and Sticks: Tile spacers for even joints, craft sticks for buttering backs, and an old credit card as a mini spreader.
* Clean-Up: Soft sponge, microfiber cloth, cotton swabs for tight spots, and a small brush for loose grit.
Pro Tip: Recycled glass and found objects add a unique sparkle and tell a story, and echo the style of ancient artisans who used repurposed materials.
Where to Find Affordable Glass Tiles: Become a Savvy Shopper
Okay, so you’ve got your list, now where do you find all this stuff without breaking the bank? Here are a few smart options:
* Online Retailers: Check out online mosaic art suppliers for starter mixes and color assortments. You can find themed blends and avoid waste.
* Local Craft Stores: Craft chains often stock vitreous sheets and nippers. Plus, you can inspect the colors in person. Don’t be afraid to ask for mis-cut or clearance bins.
* Thrift Stores & Upcycling: Get creative and upcycle! Look for thrift store glass plates, bottles, and outdated tiles. Use a glass scorer and running pliers, then tumble the sharp edges in a bucket of sand and water.
Mosaic Magic: Simple Tips for Stunning Results
Ready to start creating? Here are some tips to simplify your DIY mosaic art journey and ensure beautiful results:
* Start Simple: Don’t try to tackle a massive project right away. Begin with something small and manageable.
* Be Patient: Mosaic art takes time and patience. Don’t rush the process.
* Let There Be Light: Remember, light is your friend! Use it to your advantage to create pieces that sparkle and shine.
* Clean Cuts are Key: Score lightly, rotate the piece, and nip in small bites.
* Consistency is Key: Keep your tile size consistent so your design reads clearly.
* Level the Playing Field: Level the bed, then back-butter thin tiles for a stable sit.
* Don’t Rush the Grout: Mix to a creamy peanut butter feel, let it slake, then apply in diagonal passes.
* Practice Makes Perfect: Practice on scraps until your hands learn the feel.
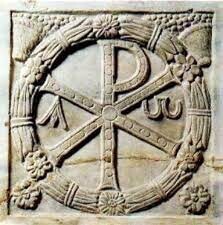 A Chi-Rho is an early Christian symbol formed by superimposing the first two capital letters of the Greek word for Christ, Christos (Χριστός). The symbol consists of the Greek letters Chi (Χ) and Rho (Ρ), which are combined to represent Jesus Christ. It is also known as a Christogram.
Common Pitfalls to Avoid: A Little Forethought Goes a Long Way
Nobody’s perfect, and mistakes happen. But knowing about potential pitfalls can help you avoid them:
* Over-cutting tiny shards: Take larger, cleaner bites.
* Setting tiles too tight: Leave even joints for grout and light.
* Using gray mortar under clear glass: Choose white or clear adhesive.
* Grouting before adhesive cures: Wait the full listed time.
* Scrubbing with a rough sponge: Use a soft sponge and microfiber.
* Ignoring a mock-up: Dry-fit borders and halos before you glue.
* Skipping scrap practice: Rehearse curves and icon details first.
* Skipping surface prep: Glossy bases need a scuff and clean.
* Letting grout scratch the glass: Test unsanded first on glossy tiles.
* Rushing cleanup: Wipe haze in light passes so you do not pull grout from joints.
* Ignoring weight: Heavy glass on flimsy bases will crack or warp.
* Skipping sealant on wood backers: Moisture will warp panels.
* Hanging with a single sawtooth on heavy art: Use a cleat or dual D-rings.
* Ignoring weight limits: Check hardware ratings before you hang.
* Placing indoor adhesives outdoors: Pick thinset and exterior grout for outside use.
Creative Project Ideas: From Coasters to Wall Art
Ready for some Christian mosaic art inspiration? Here are a few project ideas to get your creative juices flowing:
* Simple Coasters: Start with 4-inch coasters on cork or sealed MDF. Use clear adhesive and try a simple ichthys fish, a dove, or a tiny Chi Rho in a gold halo.
* Trivets or Plaques: Move up to 6-to-8-inch trivets or plaques. Seal the wood well and add a border of deep blue to echo basilica skies.
* Wall Panels: Once you’re ready, step up to 12-to-18-inch panels. Choose sealed birch plywood for indoor pieces, or cement board for wet or outdoor spots.
* Focal Wall Art: Combine four small panels into a cross-shaped grid with a central dove to guide the eye.
Project Ideas: How to Make a Mosaic Cross
A cross is one of the simplest DIY Christian mosaic projects you can take on. It is simple, often has straight lines, and is one of the key mosaic art patterns for Christians.

Here are the basic steps:
1. Obtain a wooden cross from your craft store
2. Following the instructions above, break tiles into small squares
3. Place white glue on the surface of the cross
4. Begin tiling with evenly spaced tiles
5. Grout your mosaic
6. Wipe the cross clean
Choosing Bible Themes: Let Your Faith Guide Your Art
The beauty of DIY Christian mosaic projects is that you can express your faith in a tangible way. Here are some theme ideas to consider:
* Good Shepherd: A gentle figure, a staff, and a sheep.
* Angels at the Tomb: White wings, a stone, and a quiet sunrise palette.
* Cross, Dove, or Fish: Bold symbols with clear lines.
* Noah’s Ark: Ark silhouette, waves, and pairs of animals in bright colors.
* Mary: A calm profile, blue mantle, and a gold halo for warmth.
For more ideas, be sure to look at Christian mosaic art tutorials and browse examples of Christian designs.
Putting it All Together: A Journey of Faith and Creativity
From early Christian churches to your own home, mosaics have a timeless appeal. They connect us to the past, express our faith, and bring beauty into our everyday lives.
So, what are you waiting for? Gather your supplies, choose your theme, and let your creativity soar. Remember, it’s not just about the finished product; it’s about the journey of creating something beautiful with your own two hands.
Share your creations, inspire others with your DIY mosaic art, and let the light of your faith shine through!
Affiliate Disclosure
Here’s a little transparency: Our website may contain affiliate links. This means if you click and make a purchase, we may receive a small commission. Don’t worry, there’s no extra cost to you. It’s a simple way you can support our mission to bring you quality affiliate marketing content.